
FTire: OLicense Server
License Service used for cosin products
Installation of the Server
OLicense installation package including Olicense server installers and installation manual are available from:
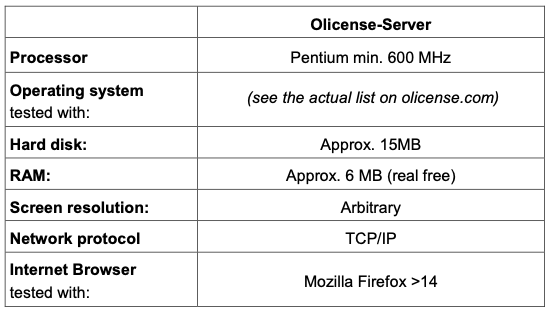
Figure 1: System requirements for OLicense Server
Follow carefully the instructions in the manual for installing OLicense server (Page 12 and following). Please keep in mind to have administrator priviledges during the whole installation process.
Once the installation is finished or a License Server is already installed on the underlying system, you need to specify the system which needs to be used for FTire simulations, as described in the next section.
System Fingerprint
A fingerprint in a licensing mechanism serves as a unique identifier that ensures the authenticity and integrity of the software or service being licensed. By using a fingerprint, we can tie the license to a specific user or device, preventing unauthorized use or distribution. This enhances security by making it difficult for individuals to share or replicate licenses illegally. Additionally, a fingerprint can help track usage patterns and compliance, allowing for better management of licenses and ensuring that users adhere to the terms of the agreement. Overall, incorporating a fingerprint into the licensing process helps protect intellectual property and fosters a fair environment for both developers and users.
The OLicense admin page will be accessed on the license server on default http port 80, if not otherwise configured by the user. Hence, just entering the license server’s URL or IP address in the web browser will be sufficient, e.g.
For a user configured port, the URL needs to be extended by the port number, e.g.
Note, local firewall rules may apply. The selected port must be accessible on the license server. You can check this for example by opening the admin page from a remote system. Once the connection to the OLicense server is available, the following web-browser view will be shown.
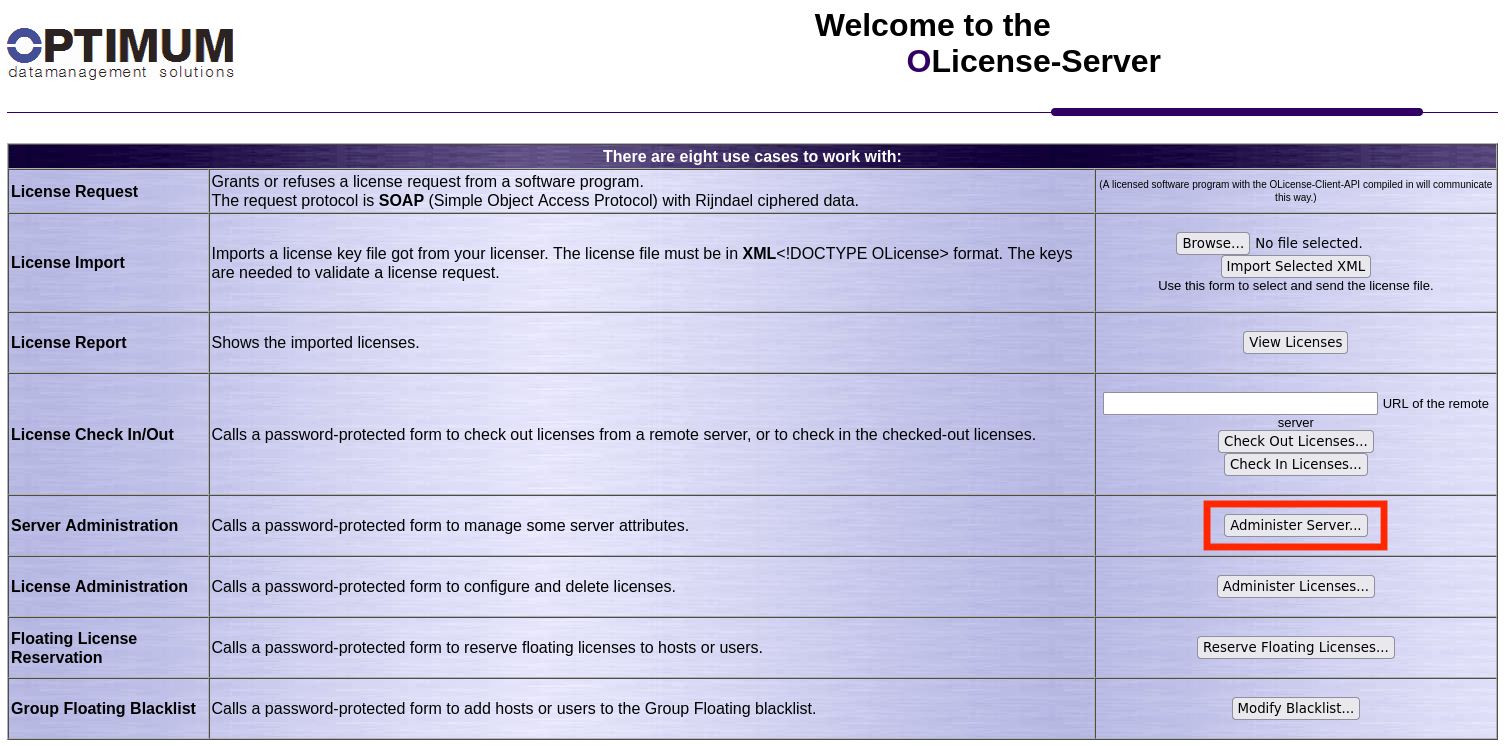
Figure 2: Browser Start-View for OLicense Server
To get fingerprint information of the server, you need to click on the "Adminster Server" button highlighted in Figure 2. This will open the follwong window.
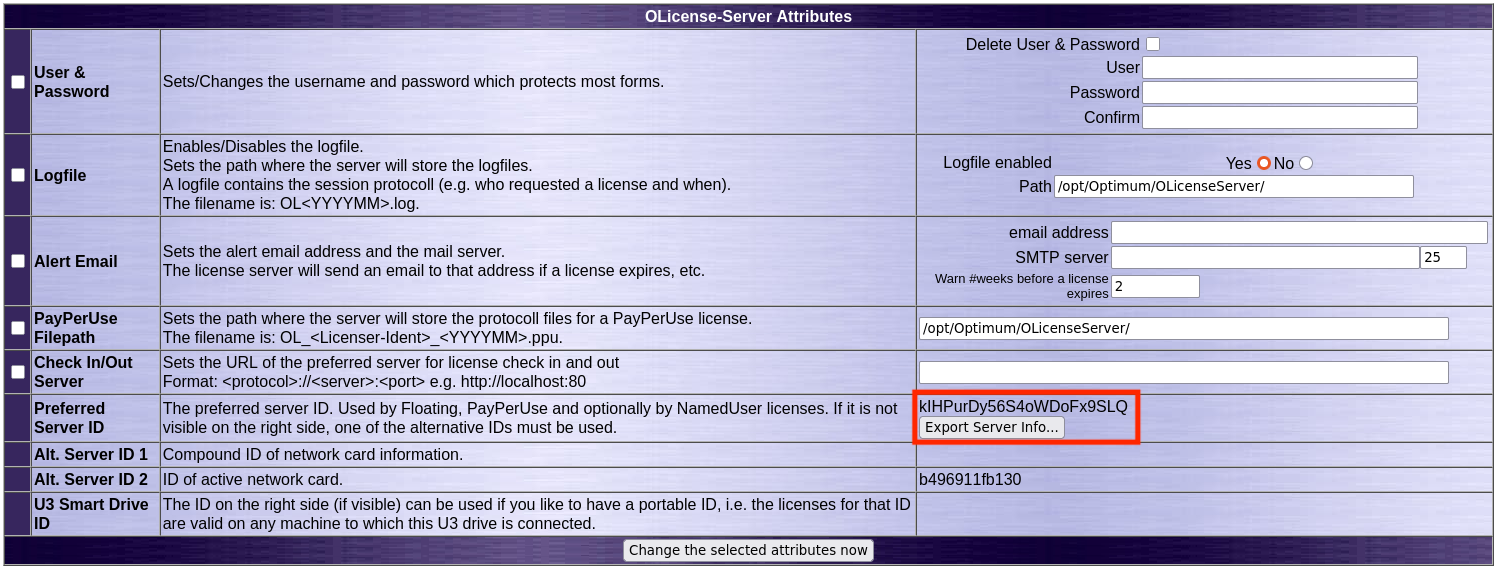
Figure 3: Administration Page of OLicense Server
In the administration section you can get the preferred server ID information. Here, you need to click on the highlighted button in Figure 3, which is named "Export Server Info". This will create a new file named OLicense.olsiml with the server fingerprint information shown in Figure 4.
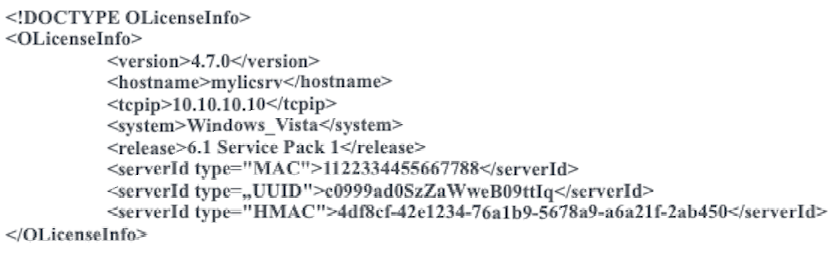
Figure 4: Server finger print information
This file needs to be sent to cosin licensing team. Please make sure to send the whole content of the file unchanged as text, not as a photography, to avoid any typos in license file generation.
In addition, sent the licensing team the name of the license manager for cosin licenses. The generate license and cosin home page credentials will be sent to this specified person of contact for now and also in the future.
License Activation
Once the license is generated the person of contact for the license will get an email with the download information. Here, also the credentials for the login area for
License Installation
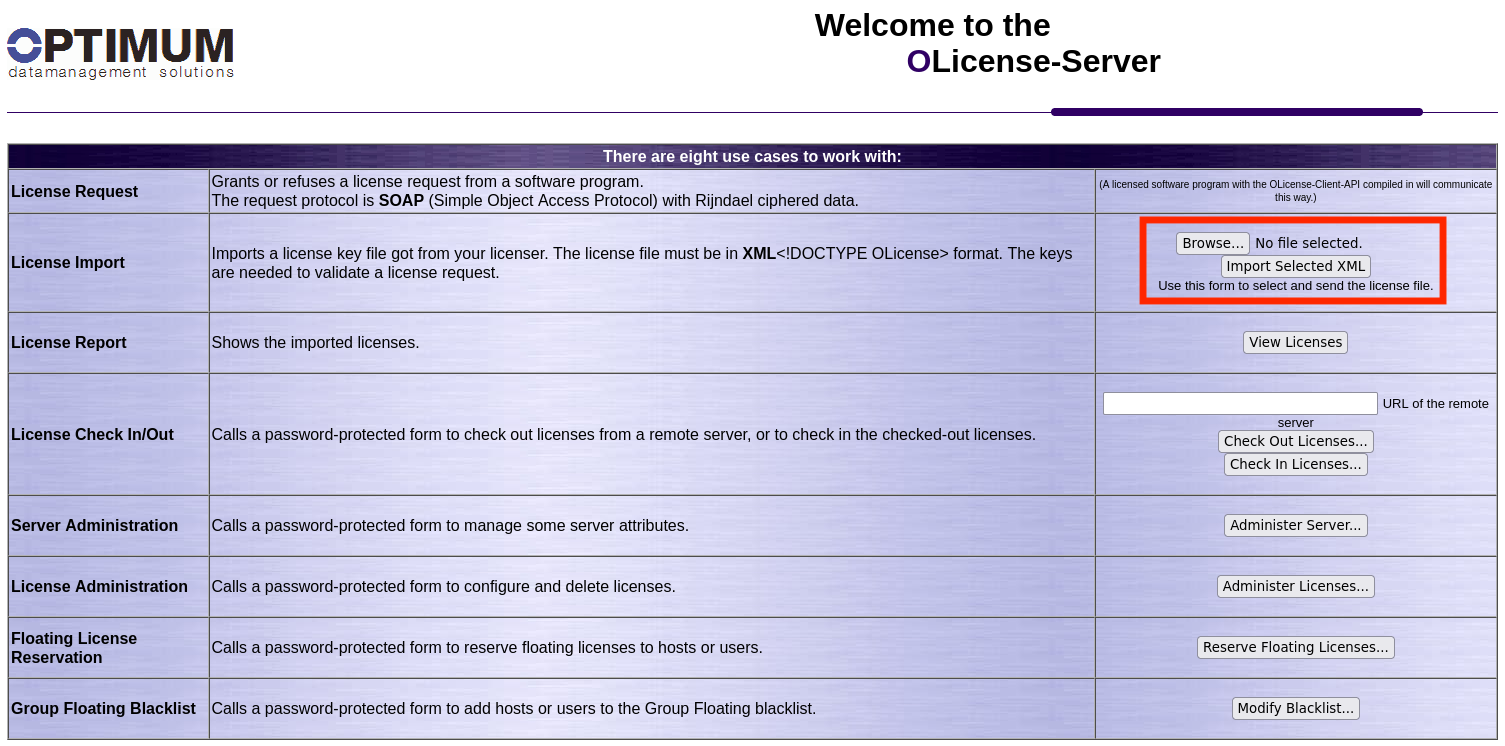
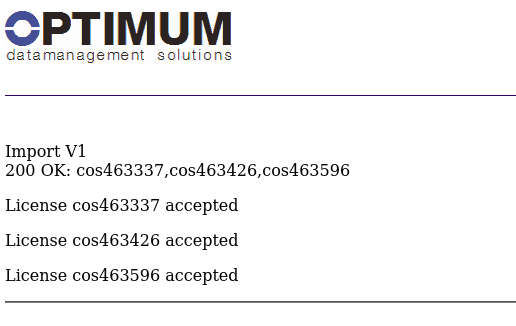
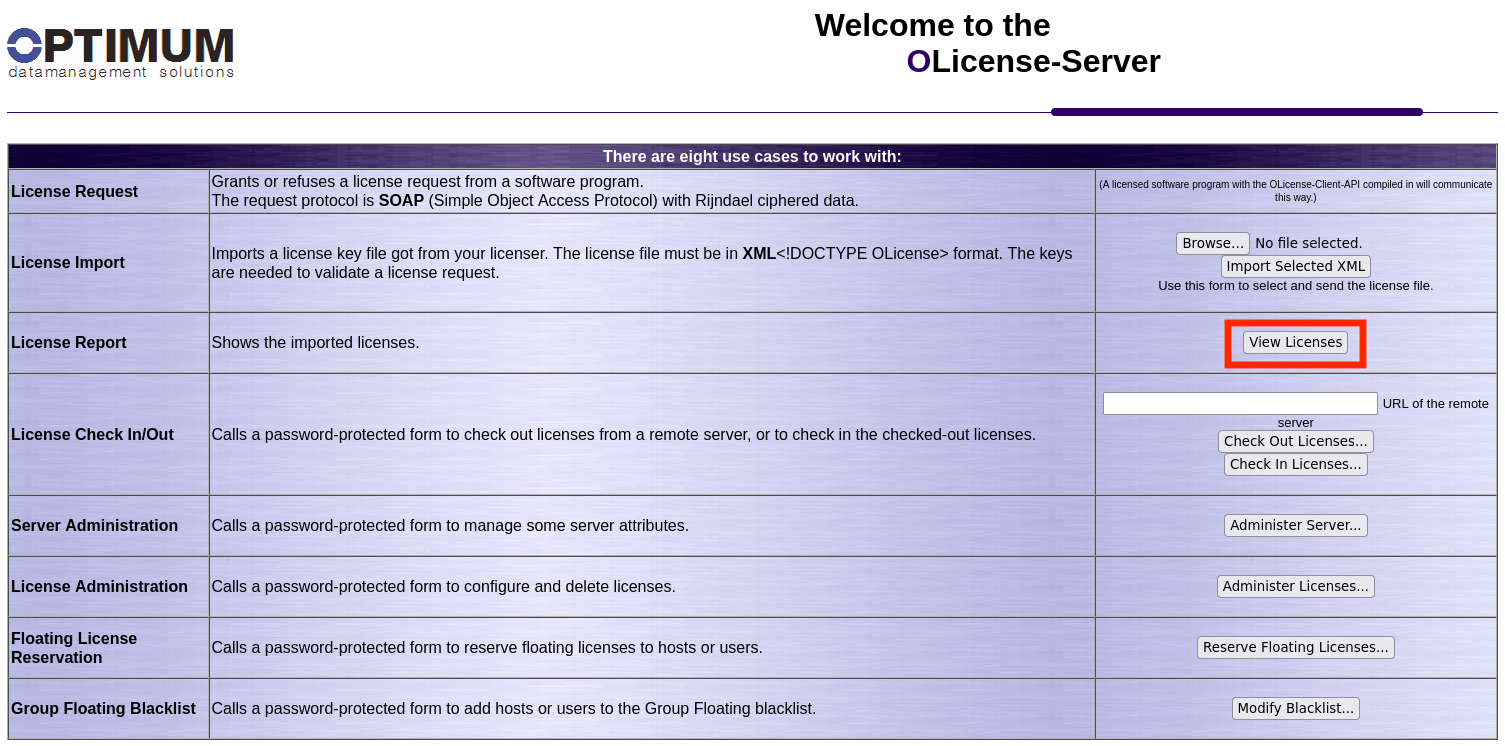

- Version Range
- License Module
- License Type
- Hardware Specificatiom (hostID), e.g. MAC address
- Expiration Date
Examples for different license issues:
- OLicense will try to match a line that satisfies all properties of the request (version range, host ID, free licenses). If one of these check fails, the line can’t be matched.
- E.g. using a software version outside the version range (column 2) will result in a „no license available“ error message because no line can be matched. There is no particular information provided to the client on the exact item that triggered the mismatch. The Olicense log file may contain further hints.
- OLicense server supports comprehensive server based rules (license reservation, group definitions, fixed assignments) that are under the administrator’s control. See the Olicense server’s manual for details. Supporting customers with setting these rules is not provided at the support hotline as these settings are only valid in the user’s environment.
Connect FTire to License
Now the license on the server must be linked to the FTire installation. Within the FTire installation, there is the “cosin” executable, which starts the cosin GUI.
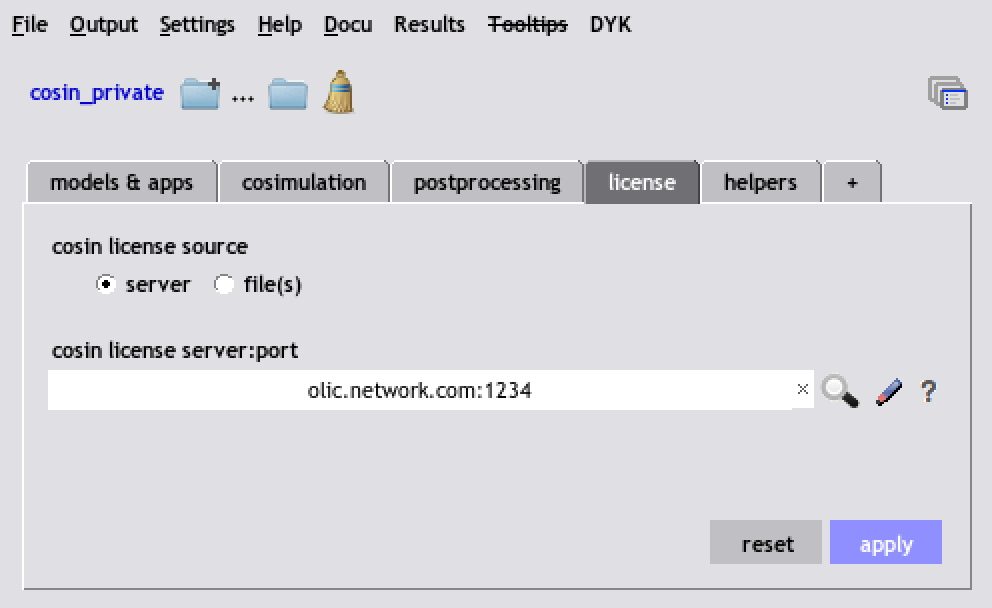
Figure 8: License Specification in cosin GUI
Here, the “license” panel must be selected to set the configuration. Since it is normally a license on the a server, the bullet point “server” must be selected here. The server address plus the appropriate port is now entered in the license server field, as shown in Figure 8.
Clicking the “apply” button automatically connects to the server and analyzes the license file. If problems occur here, an error message is displayed. If no error message appears, the license has been successfully checked out. Now, FTire can be called by any solver, who calls FTire directly. If the solver uses Environment Variables, make sure to set the cosin installation path correctly, in our setup to
- COSIN_PREFIX=/full/path/of/cosin/installation/
and add the same path for the license as shown in Figure 8 to the Environment Variable to specify the licnese file(s).
- COSIN_LMSERVER=olic.network.com:1234